Setting up VS Code
This guide provides step-by-step instructions for configuring Visual Studio Code (VS Code) for ADITO development, including installing the ADITO Extension Pack and configuring essential tools.
Preparing VS Code
- Download Visual Studio Code from the official website.
- If you are new to VS Code, we recommend reviewing the VS Code Getting Started Guide to familiarize yourself with the editor's interface and features.
VS Code comes with a command line interface (CLI) that allows you to run commands directly in the terminal. This CLI is located at one of the following paths:
- System Installer:
C:/Program Files/Microsoft VS Code/bin/code.cmd - User Installer:
%USERAPPDATA%/Programs/Microsoft VS Code/bin/code.cmd - ZIP:
<custom install location>/bin/code.cmd
This CLI will used as an entry point for any VS Code command.
Install Node.js and npm
Node.js and npm are not bundled with the IDE and must be installed separately.
- Download Node.js from the official website using your preferred installation method.
- After installation, verify the setup by running the following commands in your terminal to print the version numbers:
node -vnpm -v
Install the ADITO Extension Pack
The ADITO Extension Pack contains all the necessary tools for ADITO development.
- Open the Extensions view in VS Code (Ctrl+Shift+X).
- Search for "ADITO Extension Pack" and click Install.
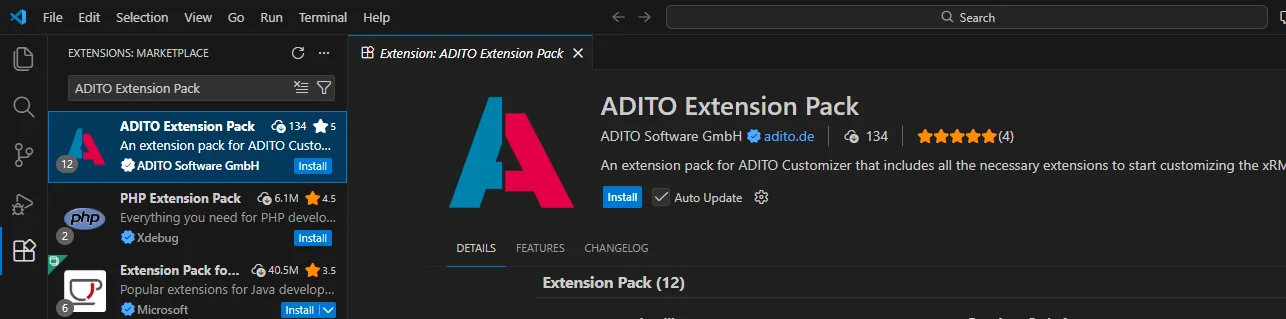
Figure: ADITO Extension Pack inside VS Code
An extension pack is a curated collection of extensions installed as a single unit. While you can install individual extensions manually, the pack ensures you have the complete recommended environment.
Extensions included in the ADITO Extension Pack
The Extension Pack combines extensions developed by ADITO with general-purpose tools for common development tasks.
- ADITO Code Preview provides navigation and previews for referenced YAML and JDito files.
- ADITO Code Completion provides completion support for ADITO YAML and JDito files.
- Liquibase 4 Integration runs Liquibase commands from Visual Studio Code. It can also be used for non-ADITO Liquibase projects. See Liquibase 4 Integration.
- Prettier provides standard code formatting.
- AsciiDoc provides AsciiDoc support.
- Regex Previewer previews regular expressions.
- npm Intellisense provides import completion for npm modules.
- ESLint checks and fixes code according to project rules.
- GitLab Workflow integrates GitLab workflows into Visual Studio Code.
- SQLTools executes SQL queries after a database connection has been established.
- MySQL/MariaDB/TiDB driver provides the SQLTools driver for MySQL-compatible databases, including MariaDB.
- Postman provides integrated API testing functionality.
- YAML provides YAML language support.
- XML provides XML language support.
The YAML extension is required for YAML language support in Visual Studio Code. ADITO Code Completion and ADITO Code Preview build on this YAML foundation for ADITO projects.
The pack is particularly useful for YAML projects. When you open AOD files directly in Visual Studio Code, you can use general text-editing and language support, but AOD files do not receive the schema-based validation or autocomplete support provided for the generated YAML workspace. Continue to maintain AOD content in the ADITO Designer and use the conversion workflow for supported editing in Visual Studio Code.
ADITO Code Completion
ADITO Code Completion provides schema-aware assistance for ADITO YAML files and linked JDito JavaScript or TypeScript processes. Install it from the VS Code Extensions view by searching for ADITO Code Completion.
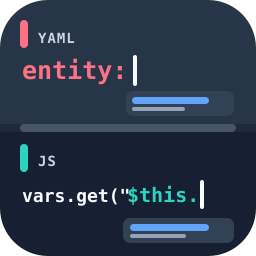
Figure: Schema-aware completion for ADITO YAML and JDito processes.
The extension reads the ADITO schema catalog configured through
yaml.schemaStore.url. In YAML files, it suggests valid data-model names for
properties marked as MajorReference or MultipleMajorReference. In linked
JDito processes, it suggests context-specific $sys, $this, and $local
variables inside string literals. JDito variable completion requires ADITO core
version 2026.1.2 or later.
It also suggests known keys in the first argument of
project.getInstanceConfigValue() and project.getPreferenceValue(). These
suggestions combine schema definitions with custom values from the project's
preference files. For missing safe local process-file references in YAML, use
the Create Missing Linked File Quick Fix to create the required JavaScript,
TypeScript, or AsciiDoc file.
When aditoCodeCompletion.createProcessFileOnReferenceInsertion is enabled,
the extension can also create a missing referenced process file automatically
when you insert its reference in a YAML file.
The extension requires a trusted workspace because it reads workspace files and schemas. If JDito suggestions do not appear after installation or configuration changes, run TypeScript: Restart TS Server from the Command Palette.
ADITO Code Preview
ADITO Code Preview lets you navigate from a YAML reference to the linked YAML artifact and edit it without leaving the current file. Install it from the VS Code Extensions view by searching for ADITO Code Preview.
The extension resolves explicit paths and symbolic artifact names. It treats
paths that begin with / as project-root-relative and paths that begin with
./ or ../ as relative to the current YAML file. A symbolic value such as
Absence_entity resolves to a matching artifact file such as
Absence_entity.entity.yaml. If multiple artifacts match, the extension ranks
files in the current context first and makes the remaining candidates available
in Peek.
Hover a resolved reference to see its selected file and a read-only preview of its YAML content.
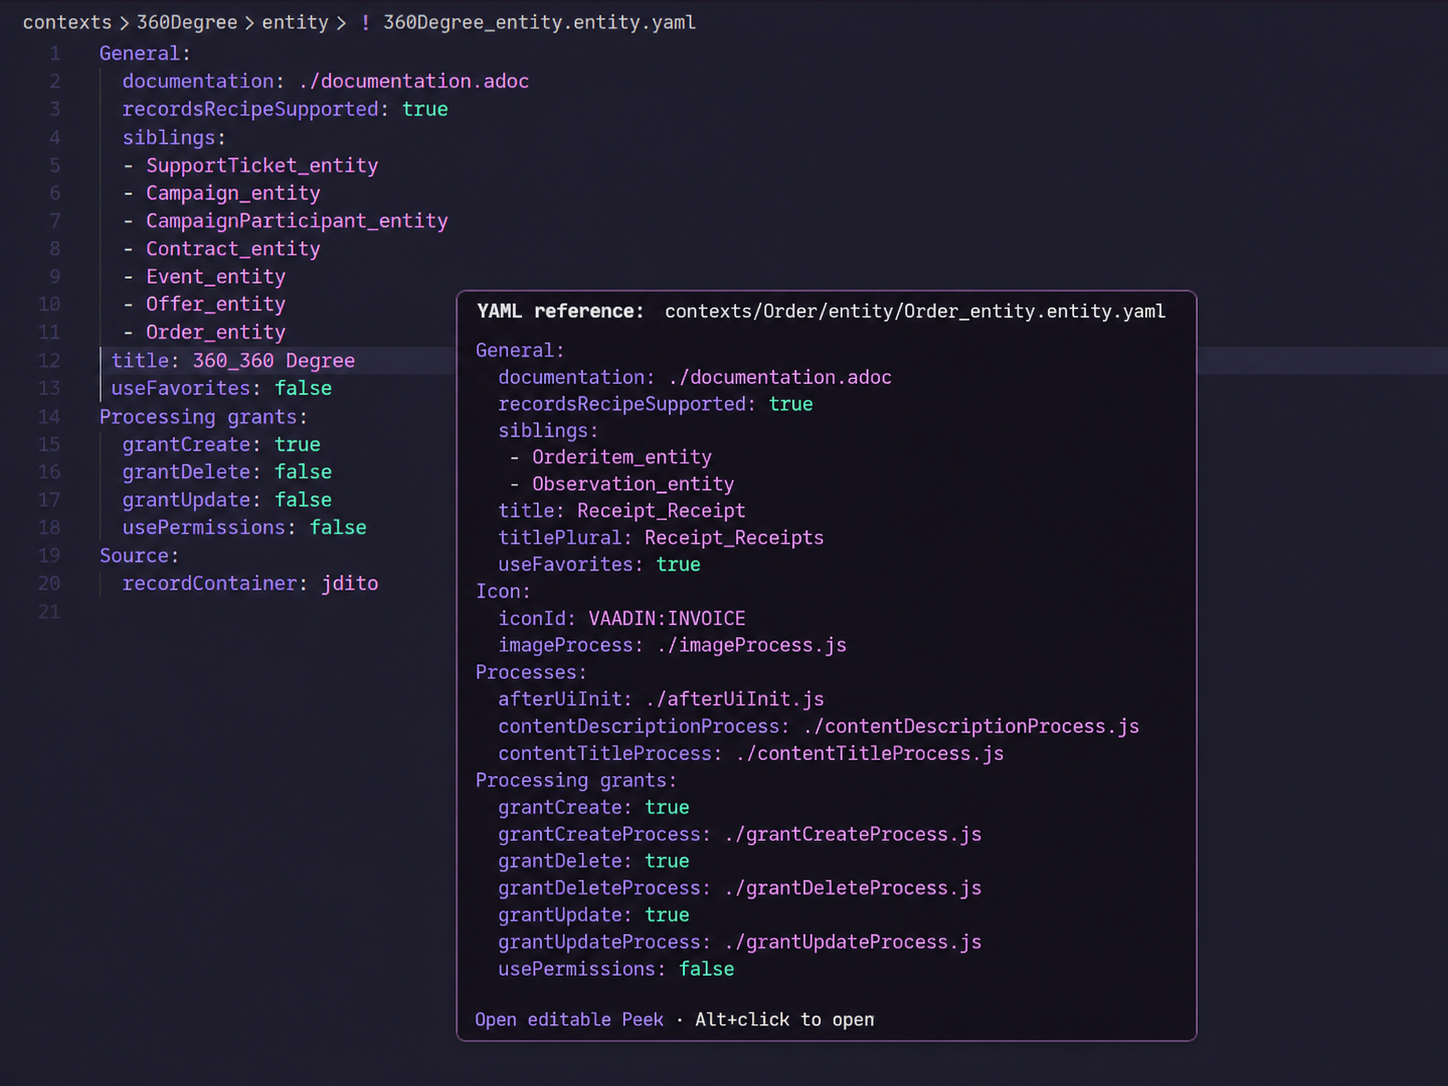 Figure: The hover displays the resolved YAML artifact and a preview of its content.
To open the target, press Alt+click (Option+click on macOS) the reference. To open the editable VS Code Peek editor, place the cursor on the reference and press Alt+F12. Save changes in Peek with Ctrl+S (Cmd+S on macOS).
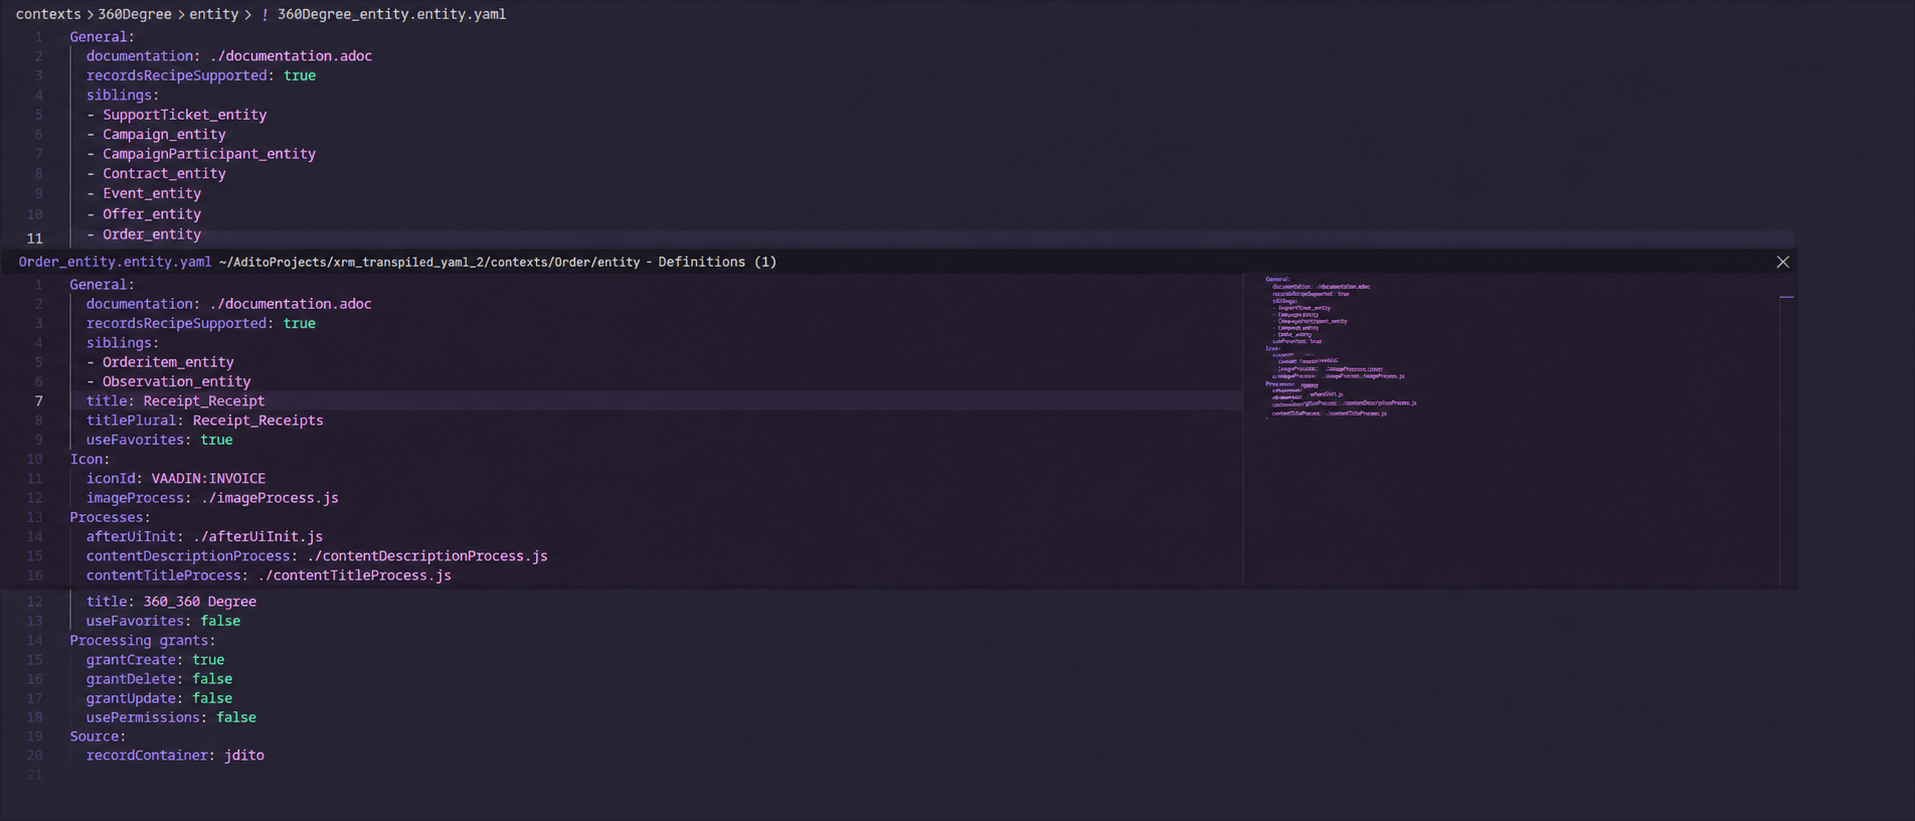 Figure: The native Peek editor opens the resolved YAML artifact for in-place editing.
The extension indexes YAML files in the workspace and respects the
files.exclude setting. When files are added outside VS Code and do not appear
immediately, run ADITO Code Preview: Refresh Reference Index from the
Command Palette. Use aditoCodePreview.caseSensitive,
aditoCodePreview.maxResults, aditoCodePreview.showWorkflowHover, and
aditoCodePreview.hoverPreviewLines to adjust reference matching and previews.
ADITO Context Explorer
ADITO Context Explorer adds ADITO-specific file and folder icons, Explorer decorations, and a logical graph for YAML contexts. Install it from the VS Code Extensions view by searching for ADITO Context Explorer.
 Figure: The ADITO Context Explorer extension icon.
Why use the logical minimap?
An ADITO context is often distributed across multiple physical folders. For
example, fields and their process files are stored below an entity, while views,
actions, consumers, providers, and services can be located elsewhere in the
context. The VS Code Explorer shows where each file is stored, but it does not
show the logical parent relationships between those definitions. This makes
it difficult to assess the structure of an unfamiliar or large context without
opening and comparing multiple YAML files.
The Context Explorer provides a logical minimap for this situation. It connects
definitions by their parent paths, groups related model folders, and lets you
move from an overview to a specific definition or support file. The physical
file tree remains unchanged, so you can use the map to understand the context
and the regular Explorer to work with its files.
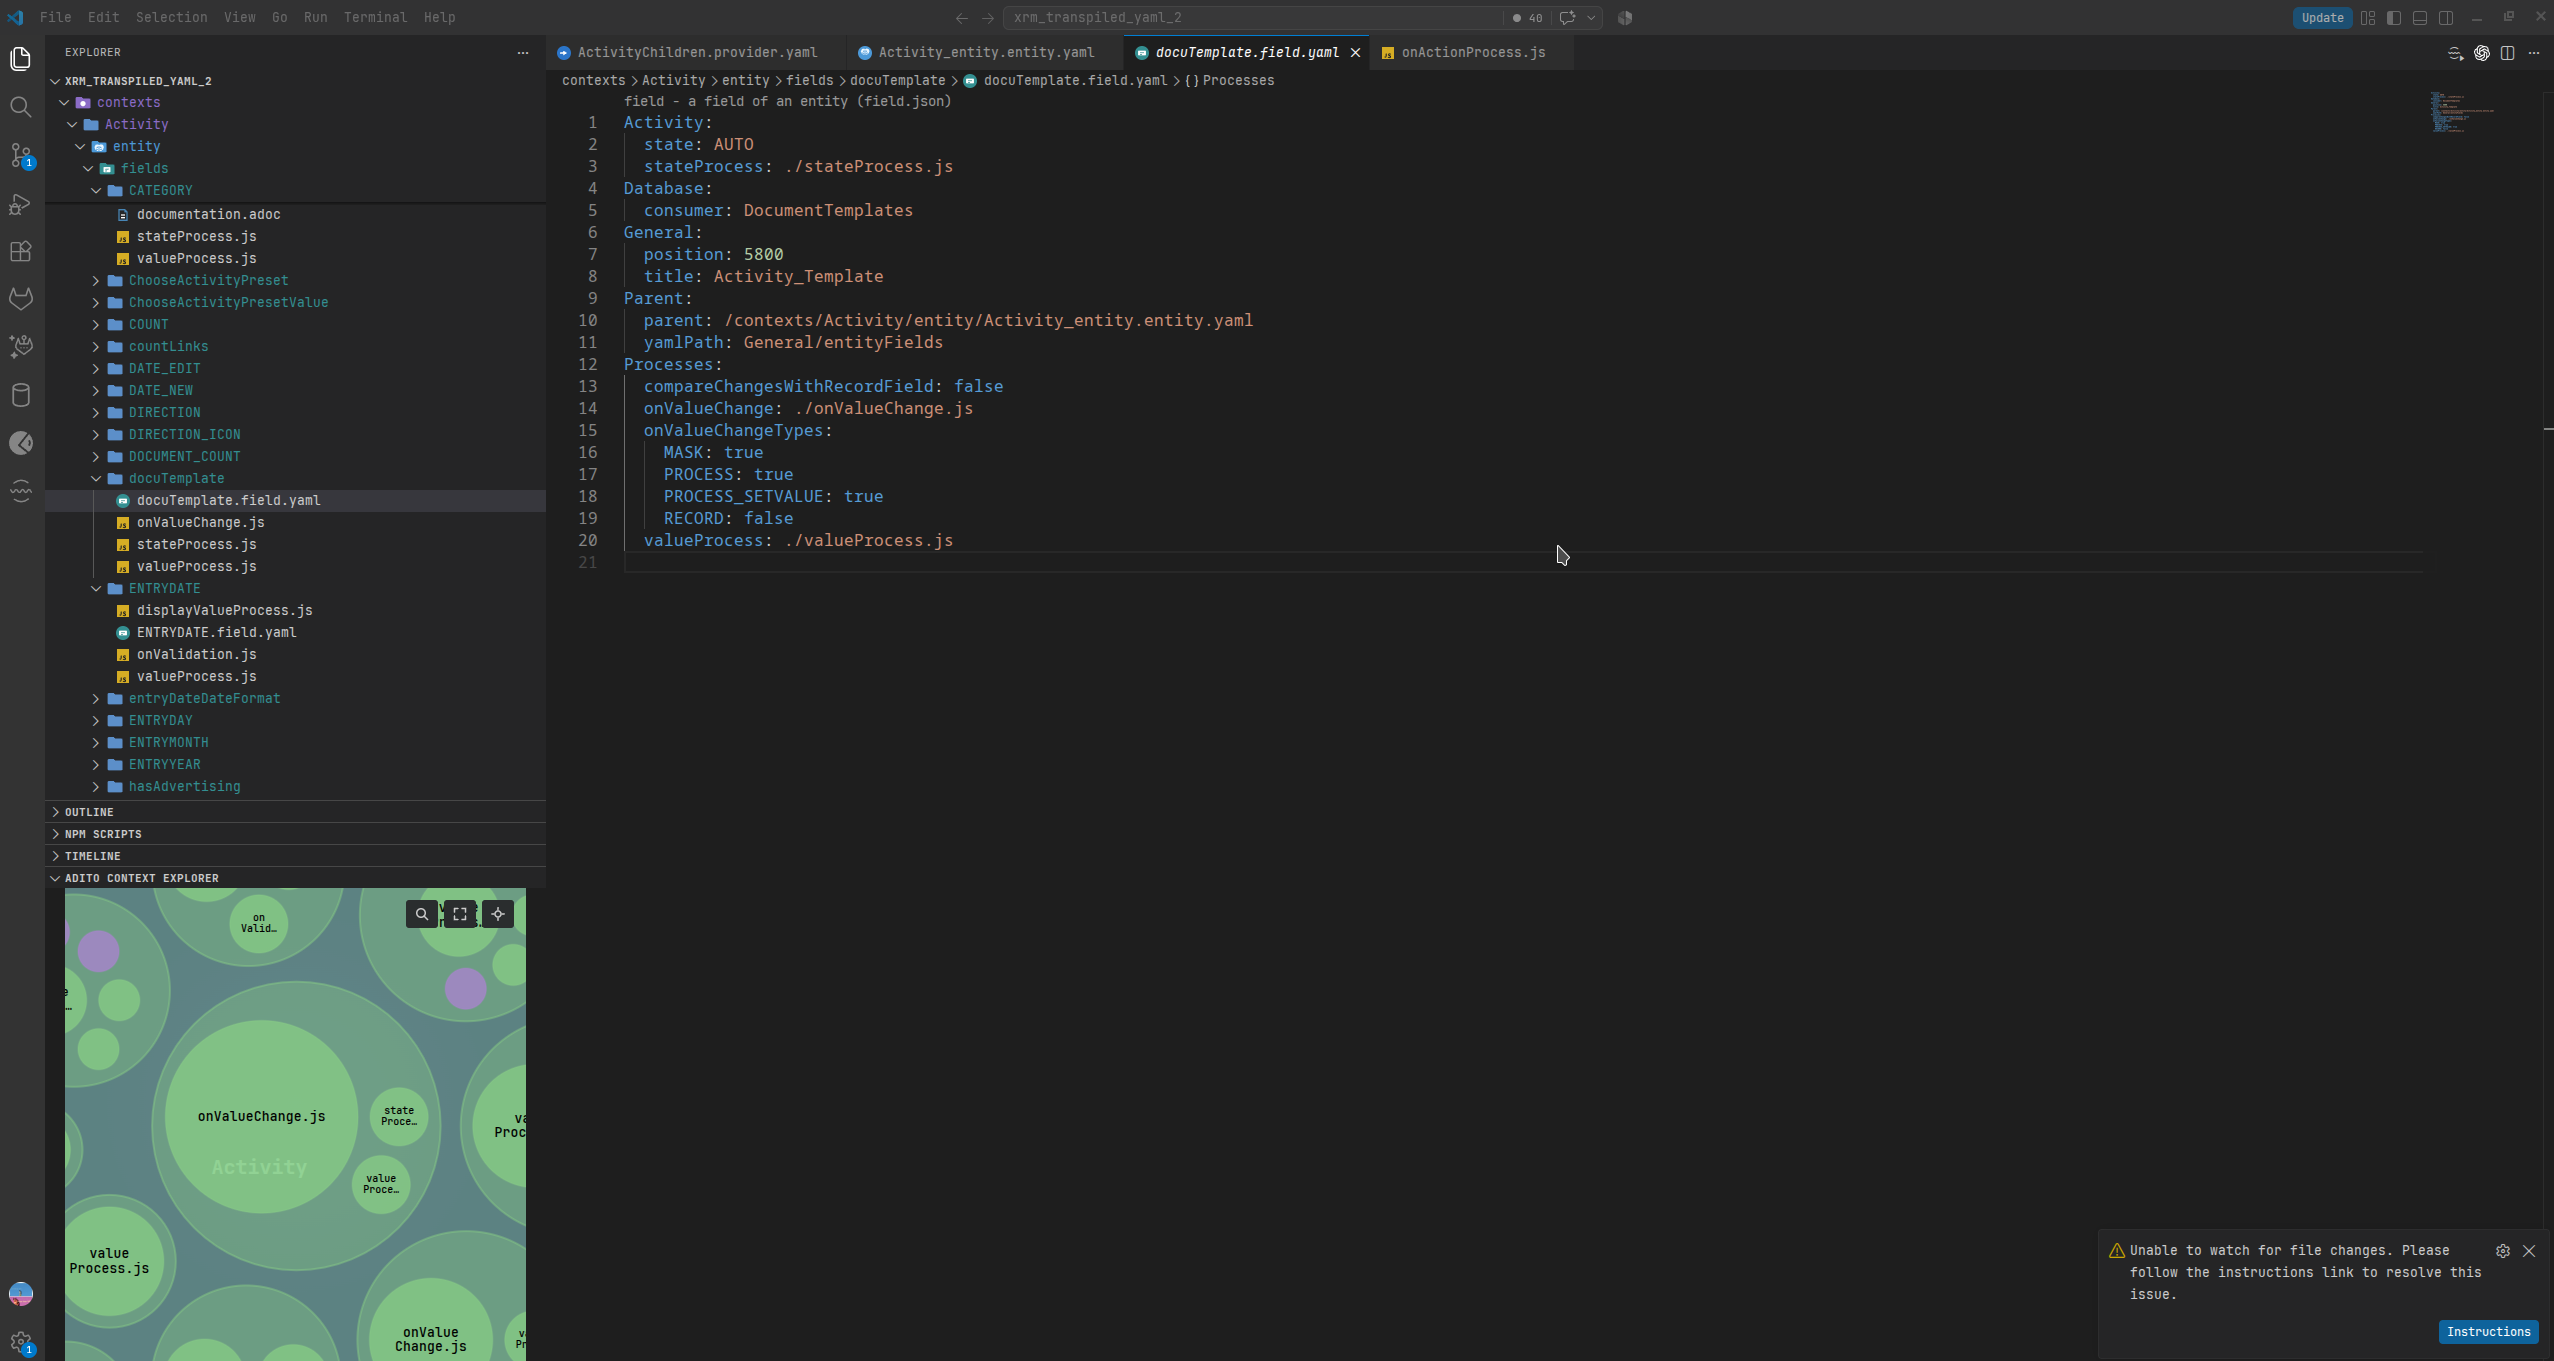 Figure: The logical minimap below the Explorer connects the current context and its support files.
To use the icon theme, open the Command Palette and run Preferences: File Icon Theme, then select ADITO Context Explorer. The theme identifies ADITO model folders and definitions, including contexts, entities, views, fields, processes, reports, dashboards, providers, consumers, and services. The extension can also color model folder names and display a model indicator for the active file in the status bar.
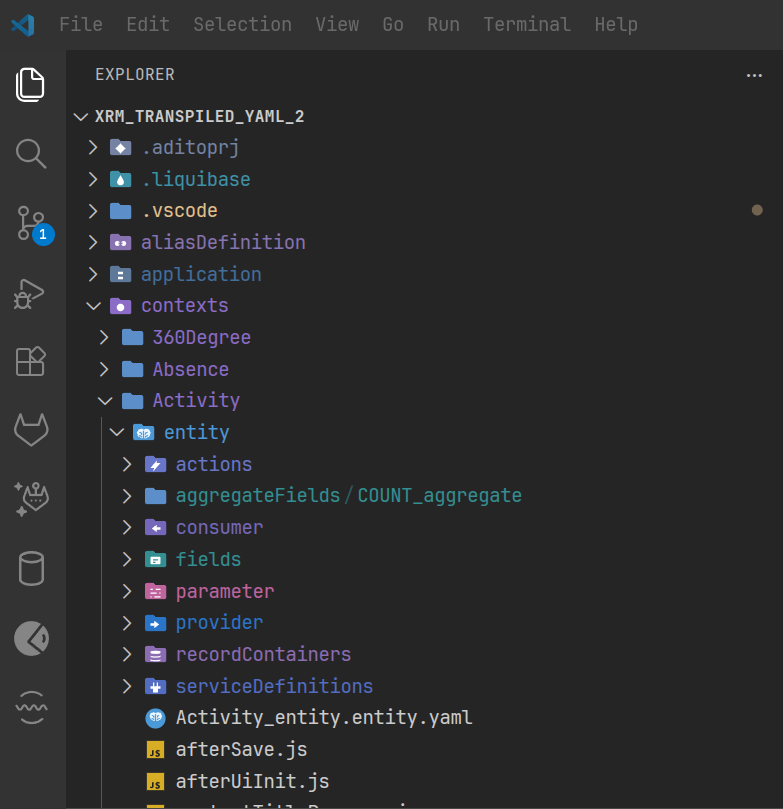 Figure: ADITO-specific icons and color decorations identify model folders and definitions in the Explorer.
Use ADITO Context Explorer: Configure from the Command Palette, or select an ADITO status-bar item, to enable or disable the Explorer decorations and status-bar indicator. The configuration also controls how the context graph groups model folders, reveals logical levels, and optionally scales nodes by the complexity of their JavaScript or TypeScript processes.
Run ADITO Context Explorer: Open from the Command Palette to inspect the
logical hierarchy of the current context. The view connects YAML definitions by
their parent paths and groups related external model folders. Select a group
or definition to navigate deeper; select a support file to open it in VS Code.
Use Maximize in the view toolbar to open the graph in the editor area.
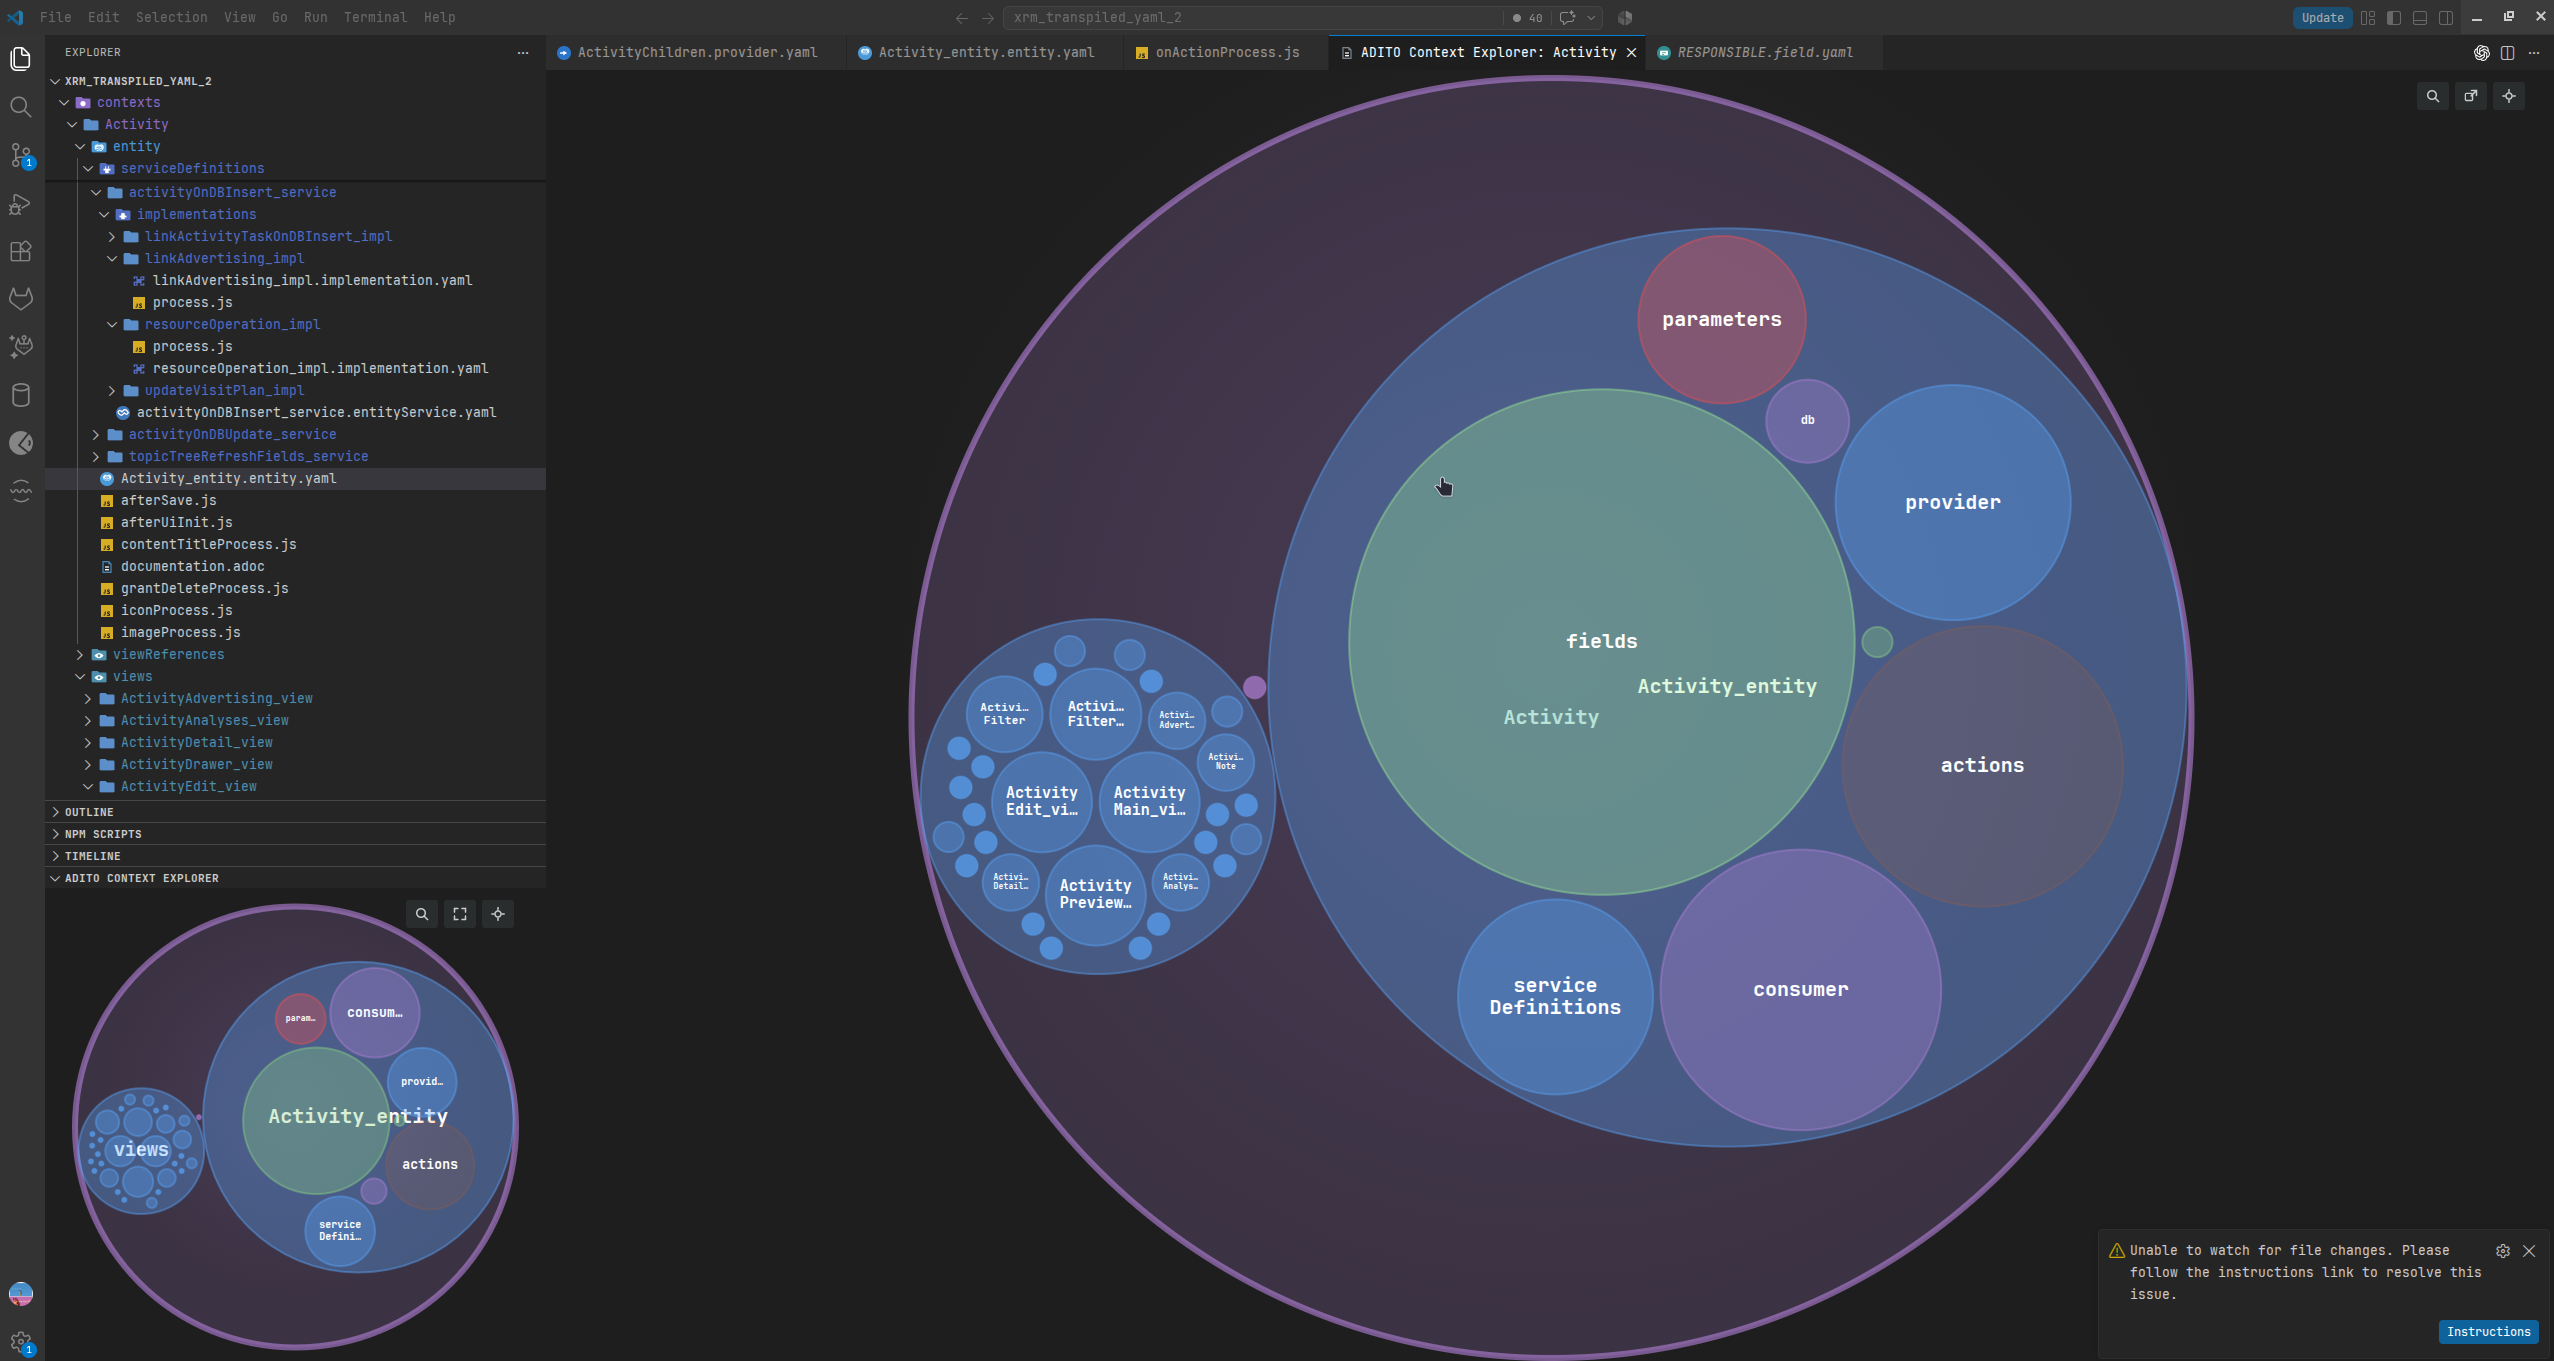 Figure: The maximized map provides an overview of an entity and its related model areas.
Optional: ADITO AI coding model
Visual Studio Code Copilot Chat can use the self-hosted adito-code model from
the ADITO AI Runtime. For setup instructions, see
Code Generation.
Optional: Liquibase 4 Integration
To use Liquibase 4 Integration within VS Code, ensure that the JAVA_HOME environment variable is correctly configured on your system.
Recommended Configurations
To optimize your development workflow, we recommend the following configurations
Auto Save
Enable Files: Auto Save to ensure your changes are persisted automatically. We recommend setting this to afterDelay or onFocusChange.
Format on save using your ESLint configuration
To keep formatting consistent and ensure your ESLint rules are applied automatically, enable "format on save" and run ESLint fixes on save in your VS Code workspace settings (.vscode/settings.json):
{
   "editor.codeActionsOnSave": {
      "source.fixAll.eslint": "always"
   }
}
With this configuration, VS Code formats your files on save and applies all auto-fixable ESLint rules automatically.
Configure this per project so the whole team uses the same formatting and linting settings.
Enable the NPM Scripts View
The NPM Scripts view allows you to execute scripts directly from the Explorer. To enable it:
- Use the command "Explorer: Focus on NPM Scripts View" from the Command Palette (Ctrl+Shift+P).
- Alternatively, navigate to "View > Open View... > NPM Scripts".
For more details on the NPM Script view, refer to the official VS Code documentation.