Task
Once you have created the Contexts, Entities, and Views, you can now create the 2 corresponding database tables and connect them with the Entities.
You can find helpful information in chapter The Basics and chapter RecordContainers.
Solution
Database tables
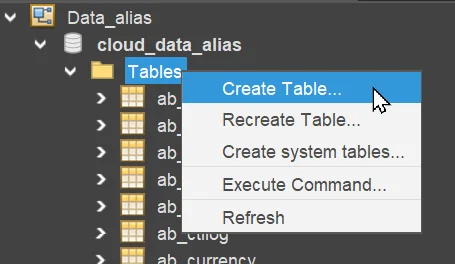
Open the database editor and choose "Create Table..." from the context menu of folder "Tables":
Now, configure the database tables CAR and CARDRIVER as follows, and press OK:
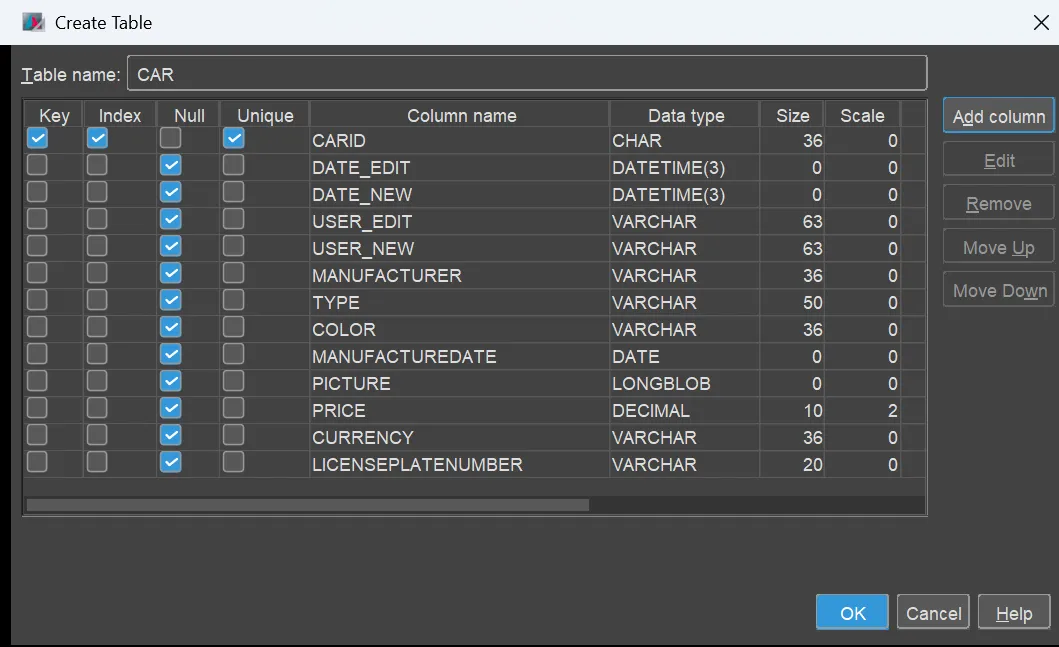
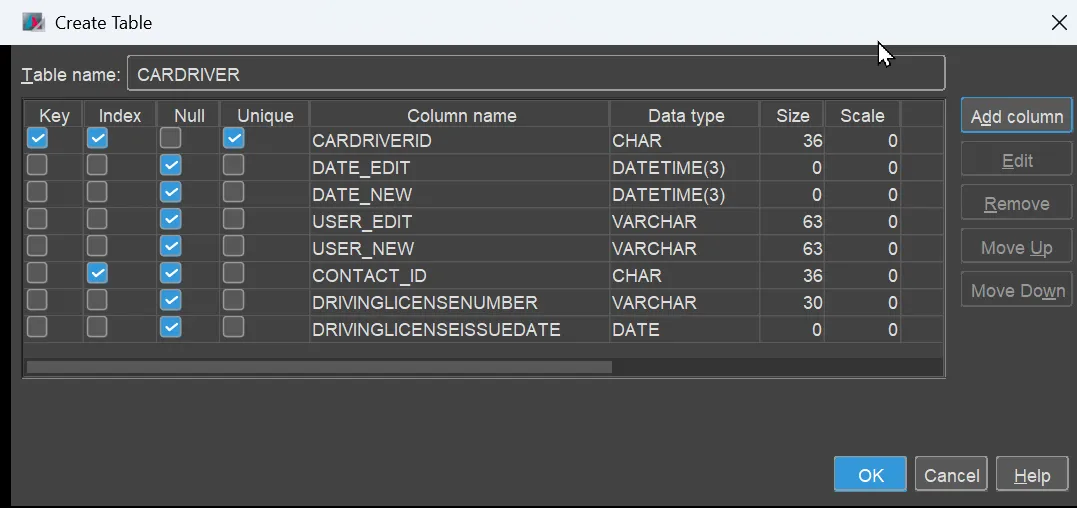
As you can see, you need to add the table name and all required columns for both Entities. Leave the predefined default columns ("DATE_NEW" etc.) unchanged. Remember, not to create columns for calculated EntityFields.
Columns holding keywords (e.g., COLOR) are always of data type VARCHAR(36). Column PRICE can be set as DECIMAL(10,2). All columns working as foreign keys are configured with index = true, but usually without foreign key constraint The latter is the recommended practice in ADITO: Except for primary key constraints, there are seldomly further constraints. This simplifies, e.g., the deletion of datasets. However, you are still free to follow your own procedure and configure, e.g., foreign key constraints.
Update of Alias Definition
When you have created new database tables or columns, they are not yet accessible in the project, before you have updated them in the so-called Alias Definition. This is a kind of copy of the ("remote") database structure (tables, columns, properties etc.) into the ("local") project.
In the project tree, update the Alias Definition via
- displaying the difference between the Alias Definition (database structure of the project) and the database tables: alias > Data_alias (double click) > (Navigator:) Data_alias > RMB "Diff Alias <> DB Table". Then you will see something like this:
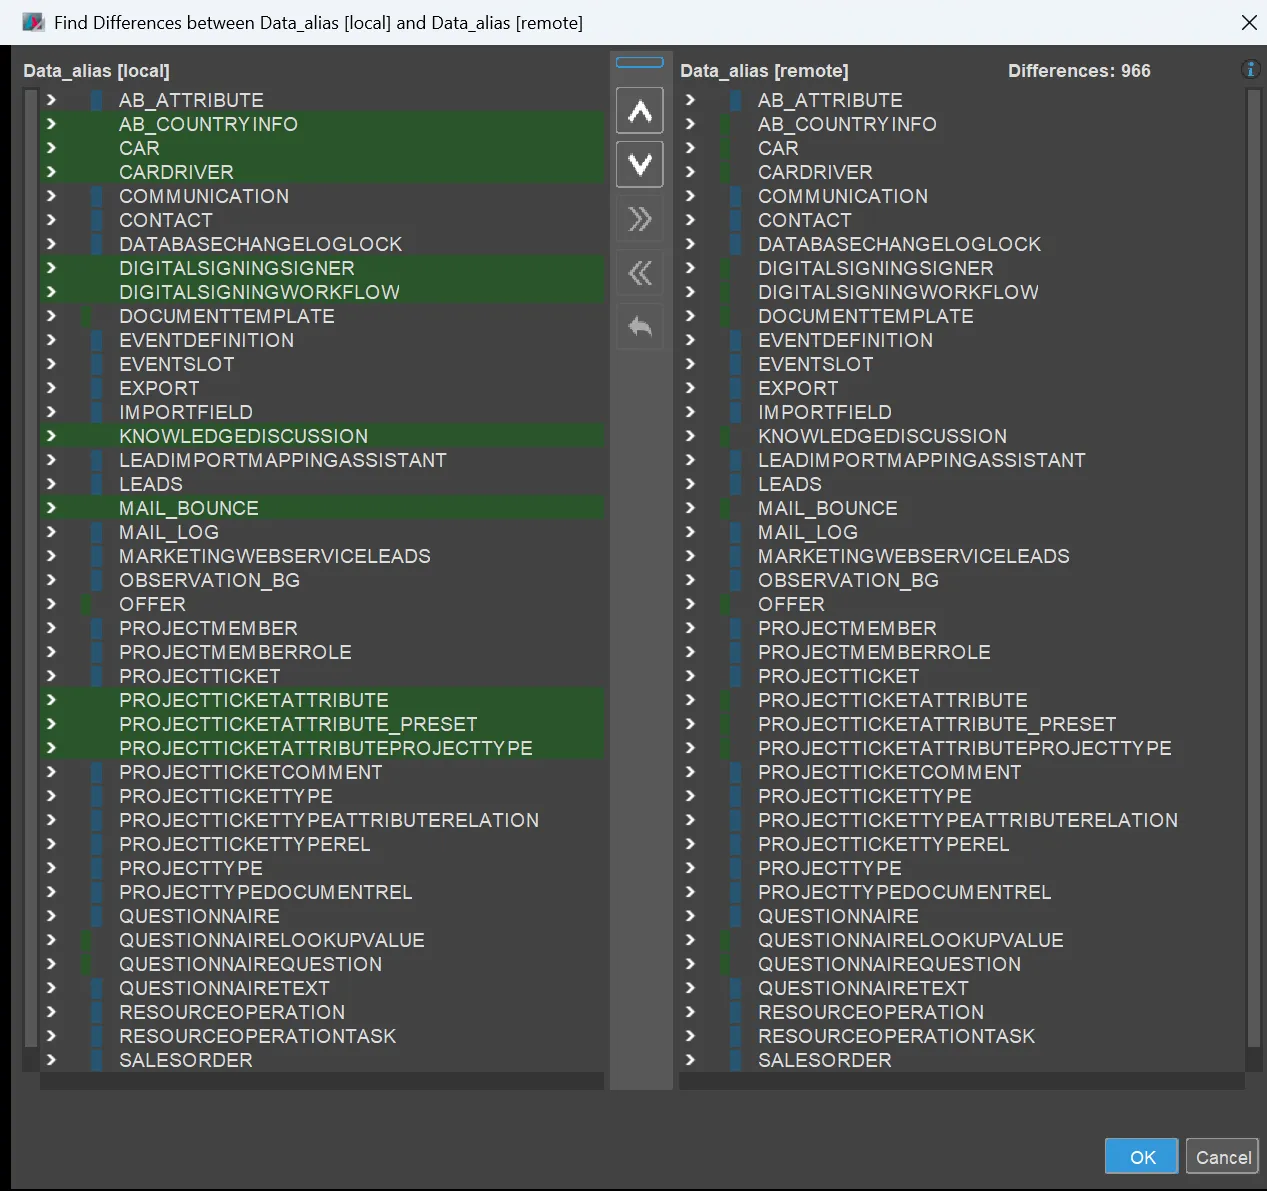
- Now mark all tables via CTRL-A and then press the double arrow from right (= database, "remote") to left (= Alias Definition, "local"), followed by OK. In a few seconds, the 2 new database tables and their columns will also be visible in the Alias Definition.
RecordContainer
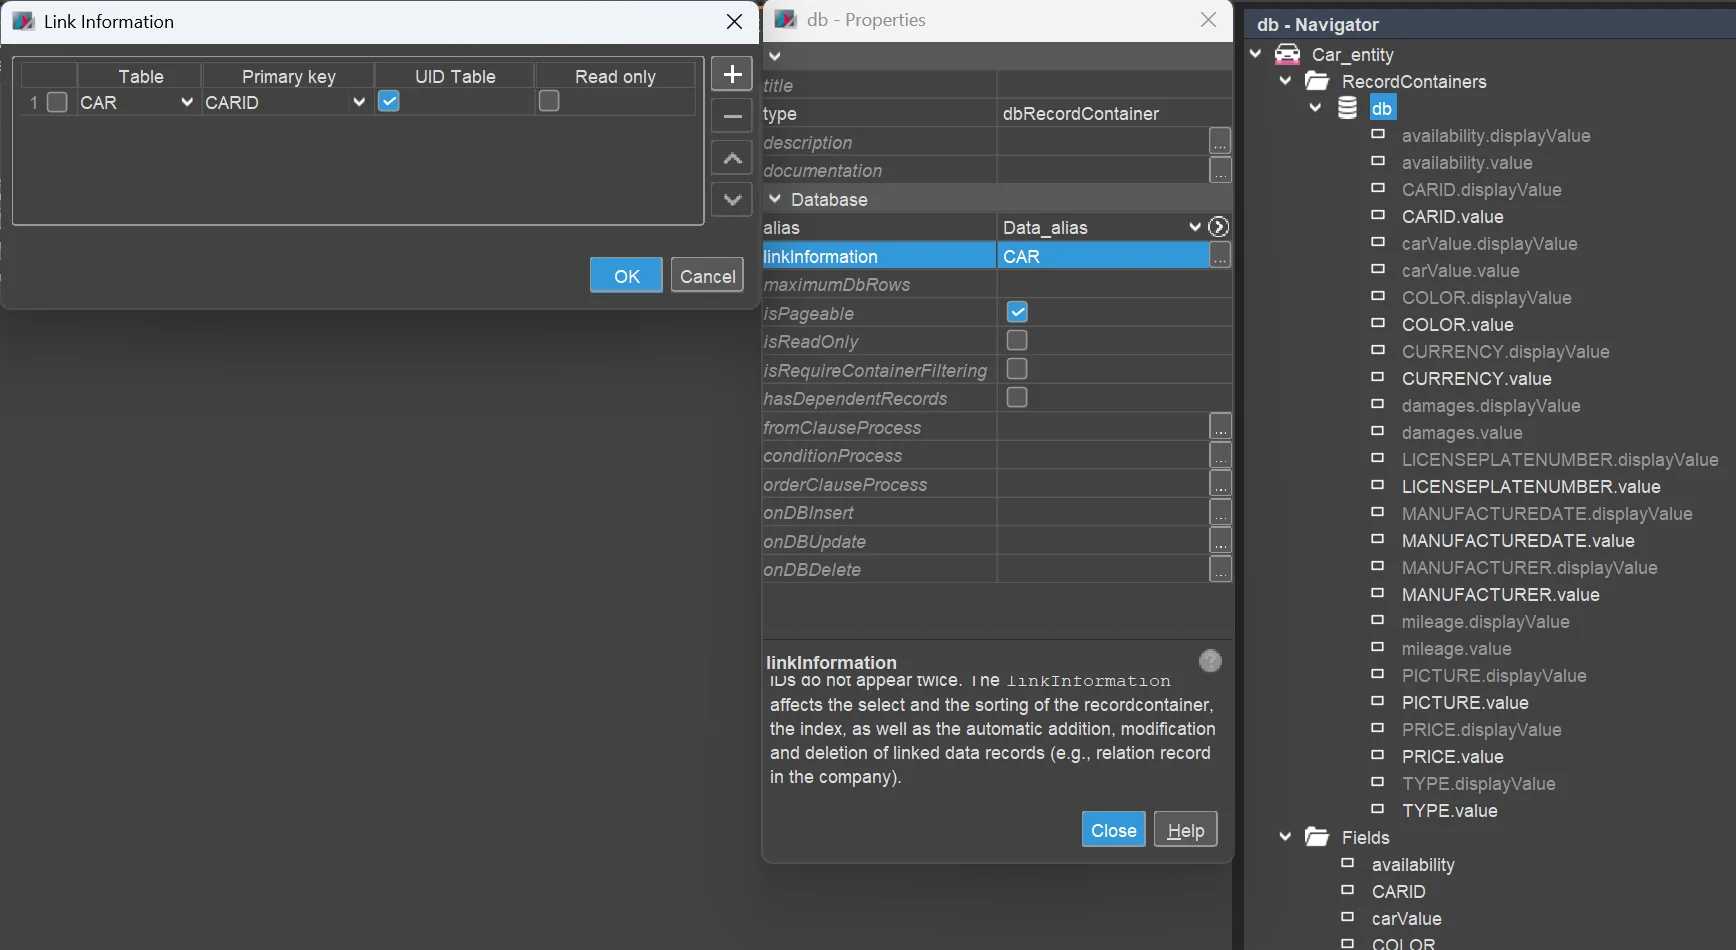
For both Entities, create a Database RecordContainer (dbRecordContainer) by opening the Entity in the Navigator and choosing "New RecordContainer" from the context menu and then selecting Type: dbRecordContainer and Name: db, followed by OK. This creates a new RecordContainer, which, in ADITO, is the instance that controls the interaction between the project and the database - in particular, the RecordContainer includes definitions about what database column is related to which EntityField.
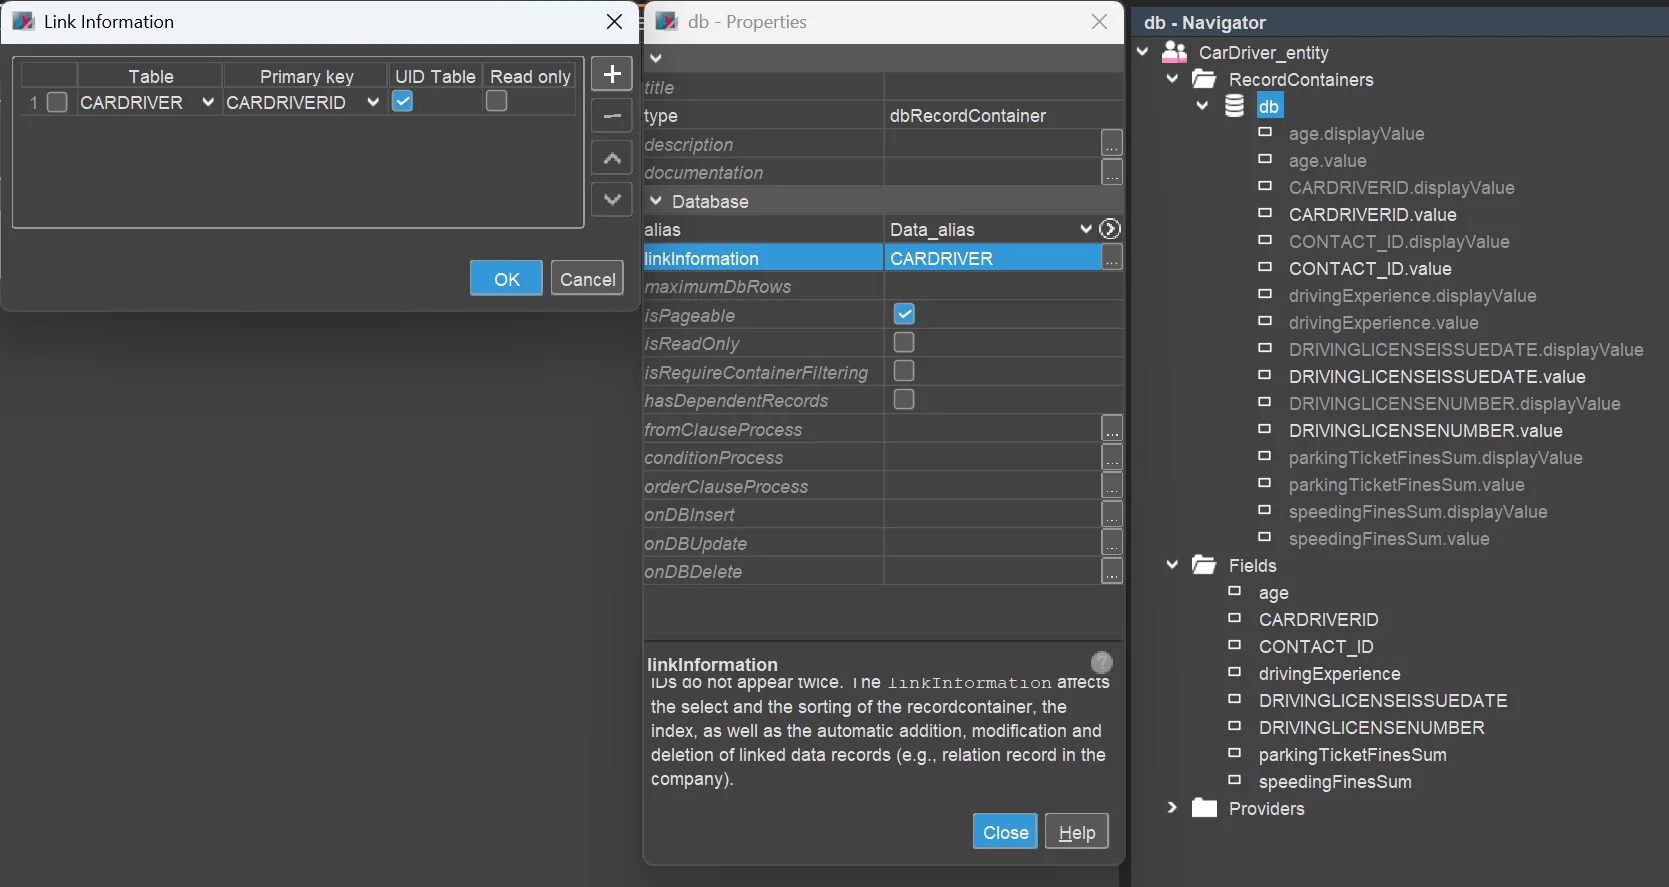
Set the RecordContainer's properties:
alias: Data_aliaslinkInformation:table: CAR / CARDRIVERPrimary key: will be preselected automatically (CARID / CARDRIVERID)
Having prepared the RecordContainer in this way, you can now map all (non-calculated) EntityFields to their respective database columns:
In the Navigator, unfold the RecordContainer's node "db". Then you see a list of so-called RecordFieldMappings, 2 for each EntityField (value and displayValue). These are to control the connection between database columns and EntityFields. If you like, this is the SELECT part of the SQL statement produced by the ADITO core when loading the data of a specific Entity. (The FROM part is configured via property linkInformation, see above.)
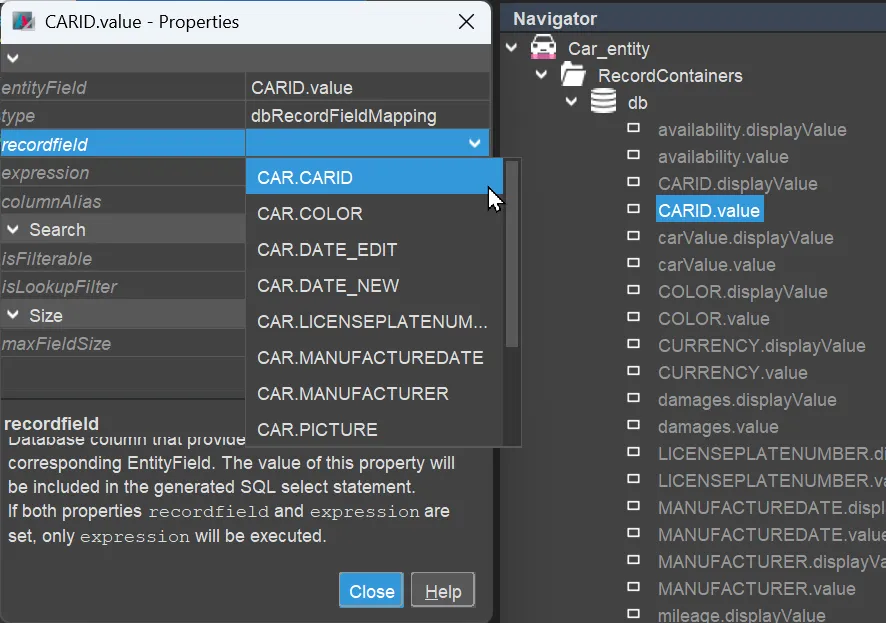
Now double-click on all RecordFieldMappings
- ending
.value(.displayValuewill be handled later) and - being non-calculated (i.e., e.g., not "damages" or "carValue").
Then, select the corresponding database column via property recordField.
The result should look something like this:
Car_entity:
CarDriver_entity:
For all EntityFields that should be included as filter criteria, set their RecordFieldMapping's property isFilterable to true.
Deploy and Test
Deploy your changes, open Context Car, and enter some test data.
As for the keyword fields (like CURRENCY) and the foreign key field CONTACT_ID, simply add some data manually. We will enable a selection via dropdown/lookup later.
The result could look like this:

Do the same for Context CarDriver.